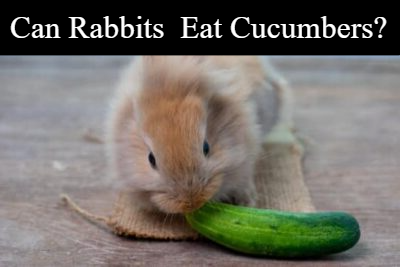
FROM SCRATCH Magazine

life on the homestead

$100 Gift Certificate to Hearts at Home Curriculum

logo-1-12

Enter to win a $100 Hearts at Home Store Gift Certificate. At Hearts at Home you will find homeschooling curriculum and homesteading & homemaking books at 30% off everyday! They have fast, flat rate shipping and a huge selection of over 10,000 products and 200+ publishers!

from-scratch-giveaway


Summer is here but if you are a homeschooling family you are already thinking about what curriculum you are going to be using next year. The folks over at Hearts at Home Curriculum Store were so nice to provide us with a $100 gift certificate to giveaway to YOU!

I headed over to their store and took a look at some things I might buy if I were lucky enough to have $100 to spend! While I was browsing I noticed that they have an entire section on homesteading curriculum! How neat is that?

Enter below!

Read More

The Kool-Aid Alternative from Everything Home with Carol

In most homes with kids, the summertime drink of choice is Kool-Aid. Everybody drinks Kool-Aid because it’s cheap and it quenches your thirst. But what is in that stuff? Sugar (lots of it), and artificial coloring.

About 20 years ago, my son was kicked out of Sunday school for uncontrollable behavior. I knew there was a problem; I just didn’t know what was causing it. Come to find out, he had a sensitivity to food coloring. Well, what do you know? The teacher gave him Kool-Aid and cookies for snack time every Sunday.

If you want something to serve your kids besides that drink that comes in all the colors of the rainbow that makes them happy (and wild or aggressive, or angry, or all of the above), try this Kool-Aid alternative. It is sugar-free, dye-free, and has a lot of extra health benefits because it’s high in vitamin C and bioflavonoids.

the-kool-aid-alternative

The hibiscus flowers give the drink a deep red color that is natural and a tart taste that really quenches your thirst. The stevia acts as a sweetener, and the peppermint gives it that refreshing coolness you want on a hot summer day.

So head on over to your local health food store and get these herbs if you don’t already have them on hand. Try this Kool-Aid alternative on your kids, and come back and let us know how you like it. I’m sure you will.

everything-home-with-carol

Read More

CLOSED- Father’s Day Giveaway

fathers-day-giveaway

Father’s Day is almost here and what better gift to give the man on your homestead than  “At Home in Dogwood Mudhole.”  The story of the Sanders – a multi-generational family – who come together and learn to farm as they aim to build a self-reliant homestead. Full of highs and lows, the family’s journey to an agrarian lifestyle is documented in this collection of letters. A must read for all homesteaders!

You can read a sample chapter here.

First, a special offer for all From Scratch readers – FREE SHIPPING when you enter the code – SCRATCH.

Now, to the good stuff!

The Prize:

A SIGNED copy of At Home in Dogwood Mudhole

To Enter the Giveaway:

1. Like At Home in Dogwood Mudhole on Facebook - Please tell them that From Scratch sent you!

2. Like From Scratch on Facebook

3. Subscribe to From Scratch Magazine

4. Leave a comment on the comments section of this post (scroll to the bottom of this page) and tell us what you think is the most challenging thing about homesteading.

The Rules:

Your comment is your entry. A winner will be picked at random and announced on Sunday.

Even though I don’t get to enter the giveaway – I will tell you what I think is the most challenging thing about homesteading. Time management… There are SO many things to do EVERY day… I feel like I will never have everything done at the same time…

CONGRATULATIONS Marie in Montana – check your email because you are the winner!

fromscratch-sponsors

Read More

Scrap Wood Garden Edging from Farmhouse38

scrapwood-edging

We have a very long driveway.  Along this driveway runs a very long planter bed.

This is what it looked like when we bought the house:

dsc_0147

So originally, we built a raised bed of pressure-treated wood to hold in all the dirt.  For the last few years, it’s looked like this:

dsc_0031

Nevermind the squirrel-hunting hijinks happening here (and also nevermind the pre-renovation ramshackle garage).

When we acquired the chickens, there was a whole lot of this going on in those beds:

dsc_0106

And this:

dsc_0168

It looks bad, I know. This looks like roadkill. But this is a seriously contented bird lolling in the warm dirt.

And this:

dsc_0029

And so, most days, our driveway winds up looking like this:

dsc_0012

img_3769

Because of some very serious neat-freak issues, this just wasn’t working for me.  The obvious solution is to fill the planters with so much vegetation that there is no free dirt for the ladies to get into….but this is a huge bed to fill, and, though I am working on it, I needed a quicker solution (and also, I happen to get a kick out of watching their dirt bath antics).

Enter our ever-expanding piles of scrap wood:

dsc_0045

With so many projects going on all the time, we are constantly collecting remnant wood….in fact, most moments, we are completely overrun with scrap because I refuse to throw it away.  So when we can come up with a use for it, especially a cute use for it….I get unnecessarily excited.

The scrap that I used for this started in all shapes and sizes: slabs of plywood, bits of 2×4, planks ripped off the side of the old garage, cedar fencing, and more.  You may remember this photo from a previous post about our scrap pile.

scrap

I selected my victims and cut the wood into completely random bits, all roughly around a foot or so tall (but sometimes as short as 6 inches tall, just to get a really good gap-toothed vibe), varying widths.  There was really no rhyme or reason, at all.

dsc_0002

Then I gathered up all my miscellaneous cans of leftover house paint (my theory was that these were all colors I had used throughout the house and garden and so, therefore, they’d coordinate.  Right?  Right.), and painted them randomly and sloppily.  A lot of these pieces already had old paint on them–I slapped new paint on a few of them, but mostly left the old weathered pieces alone.  Also, I left quite a few pieces completely unfinished.

dsc_0027-2

I wanted the paint finish to be patchy on these, because I want them to weather a bit naturally–I like the look of old, chippy weathered wood.  Obviously, if you want these to last a good long time, you’d better seal them up really well and not follow my lead.  But I want mine to weather.  I may seal them once they’ve aged a bit.  We’ll see.  I get distracted pretty easily.

After the bits and pieces dried, we screwed them in, in random order to the inside edge of the pressure-treated wood curb.  Obviously, not everyone has such a curb–I share my recipe for a stand-alone version down below.

dsc_0058

dsc_00521

The real point of this edging, for me anyhow, was to keep the chicken dirt bath spray somewhat contained.  Remarkably, it’s totally working!

dsc_00171

dsc_0022

The chickens don’t seem the least bit fazed by it.

dsc_0027

dsc_0112

The varying heights of the edging allows for some very lazy bug picking maneuvers.

dsc_0049

Squirrel hunting is a much tidier affair now that the edging is in place. Chance approves (actually, it’s quite obvious in this photo how much he could actually care less).

We are currently in the process of turning our back garden into a ‘Chicken Garden’; what was once my enchanting, flower-filled oasis has literally gone to the birds.  As part of this do-over, I want to use this scrap edging back there, as well.  The only problem is, there’s no wood curb to attach it to….we needed to modify it so that it could be free-standing.

From Home Depot, I grabbed some cheap garden-variety garden edging that comes in two foot strips that click together on the ends.  I also got me some metal garden stakes.

dsc_0019

For my purposes, the metal stakes needed a couple of holes drilled into each of them (though I am sure there are stakes that come like this, I just haven’t found them yet).  This is a little time consuming, but easy enough with a metal drill bit.

dsc_00501

Now lay out your wood pieces and attach the plastic edging to their backsides with an industrial stapler.  Let the pointy side of the plastic edging stick out beyond the bottoms of the wood pieces–this goes into the ground and helps stabilize the whole thing.

Scrap Wood Garden Edging from Farmhouse38

Now screw in your stakes, one on each end of the two-foot length of edging.

dsc_0055

Finally, pick your spot, and pound that sucker into the ground.

dsc_00601

Unfortunately, the Chicken Garden is a work in progress….you’ll see the final results of this edging project when I do the reveal post on that.  Soon!  Very sooooon.  Bear with me.

farmhouse38


Read More

Homemade English Muffin Recipe from The Road to the Farm

englishmuffin-photo1


When I think about my frequent compulsion and delight in making food from scratch, I always return to my interest in connection and transformation. I like taking an active role in knowing not only where my food comes from but being deeply involved in making it. And this making is a transformative process. I often think that, to some, I might appear a little crazy as I try to make more and more food in my own kitchen when it is so easily available in store bought form.

This makes me think that I have to sell the idea, to convince you and others, by saying how it’s actually really easy or it will save you money or it just tastes better.

I’d love for you to try making more food from scratch, especially if you’ve never done it or if you do it a lot and want to try something new, but I’m actually not very good at a sales pitch.

englishmuffin-photo2


Although I almost never buy them, English muffins are a wonderful breakfast treat. I’ve tried making them a few times in the past several years but they never seemed as good as the nook and cranny full ones I could buy. As much as I love the satisfaction of pulling it out of my own oven, sharing something I made by hand, there are times when homemade might fall short. Especially if you live with someone who nearly always prefers the grocery store versions that he grew up with, it might not matter that something homemade is healthier or more flavorful.

englishmuffin-photo3

In the past month, I’ve tried a couple of different English muffin recipes and come to realize that there is another layer to the satisfaction of homemade. Instead of believing that just making it myself is enough, I realize that often it is worth it to pursue the best I can make. This may happen over years or over trying a few recipes, or stumbling right away on something so good. And that’s another beauty to making it yourself: you can try it again and again. After the plates are emptied or the first batch gets eaten you have a blank slate to try another version, change the flavors, or find a new recipe that might get you closer to the results you want.

I am far from being a perfectionist but I’m realizing that I want to keep honing my skills. The goal is not to just try making English muffins because I’ve never done it but to enjoy really good English muffins if that’s what I want to eat.

englishmuffin-photo4

Homemade English Muffins


English muffins are often cooked on a skillet on top of the stove, but it can be easy to burn the outside while the inside stays uncooked. This recipe gives them a quick trip in the oven where they should be perfectly cooked. At first I avoided this recipe because of the extra potato step but it really helps the muffins get the perfect texture. Although this recipe seems long, there is not a lot of hands on time so don’t let that keep you from great homemade English muffins.


1 medium yukon gold potato

1 1/3 cups water (11 ounces) at room temperature

8 ounces all purpose flour

8 ounces whole wheat flour

1 tablespoon honey

2 1/2 teaspoons salt

1 1/4 teaspoon yeast (instant or active dry yeast — both will work fine)

6 tablespoons water at room temperature


oil for the bowl and your hands

flour to keep the dough from sticking when shaping

coarse cornmeal for dusting the baking pans


Peel the potato, cut it into small pieces and boil in a pot for about 10 minutes. When the pieces of potato are soft, drain the water and mash the potato. You should have about 1/2 cup mashed potato. Let cool completely.

Once the potato is cool, place it in the bowl of a stand mixer with a dough hook attachment. Add the 1 1/3 cups water, all purpose flour, whole wheat flour, honey, salt and yeast. Mix on low speed for about 10 minutes, until the dough is smooth and sticky. Turn off the mixer and let it rest for about 5 minutes.

Start the mixer on low again. Let it mix for a minute or so and then begin adding the additional water, 2 tablespoons at a time. After each addition, mix until the water is evenly incorporated, scraping the dough from the hook and sides of the bowl as necessary. Once you have added all 6 tablespoons, continue mixing until the dough is even and smooth. It will be quite wet and stretchy.

Oil a bowl and scrape the dough into it. Cover it will a clean tea towel and leave in a warm place to rise. After 30 minutes, it is time to turn the dough. Oil your hands to keep them from sticking. Uncover the bowl and reach your hand to the dough across from you picking up the dough on the far side of the bowl and folding it over to the side closest to you. Turn the bowl a quarter turn, pick up the dough on the far side of the bowl and fold it over again. Repeat this two more times until you have gone all the way around the bowl. Cover and leave the dough for another 30 minutes. Turn the dough again in the same way. Cover and let rest for one more hour. By now it should have increased in size and become inflated and bubbly.

Now, you can cover the dough so it is airtight and refrigerate it over night or continue making the English muffins. For the next step, generously flour your work surface. Line two baking sheets with parchment paper and dust them with coarse cornmeal.  Oil or flour your hands since the dough is very sticky. Remove the dough from the bowl and divide it in half. Set half the dough aside. Divide the other half of the dough into 6 equal pieces. Take one piece at a time and roll it between your hands to shape it into a round disk. Place it on the baking sheet. Repeat this with all six pieces of dough, placing them evenly apart on the baking sheet. Divide the second half of the dough into 6 pieces and do the same. Cover the baking sheets with tea towels and leave them to rise until they have doubled in size. This will take about 1 – 1 1/2 hours if the dough was not refrigerated and 2 – 2 1/2 hours if it was.

About 30 minutes before you are ready to bake, preheat the oven to 425 degrees F. Bake the muffins for 8 minutes. Remove the baking sheets from the oven, flip over each muffin and bake for 8 more minutes. Let the English muffins cool on a wire rack. Slice in half and toast or serve as you like. You can freeze the English muffins or keep them refrigerated in an airtight container for up to a week.

the-roat-to-the-farm


Read More

Happy Hen Treats Prize Pack Giveaway

Happy-Hen-Treats-Prize-Pack


Our chickens loves these treats from Happy Hen Treats! They are a great way to spoil your flock!

happy-hen-treats-chicken

Purchase some Happy Hen Treats Mealworm Frenzy, 10-Ounce and you will have some happy hens! Or you could enter the Happy Hen Prize Pack and WIN your hens some treats!

All you have to do is:

  1. Like Happy Hen Treats on Facebook - Please tell them that From Scratch sent you!
  2. Like From Scratch on Facebook and Don’t forget to subscribe to From Scratch to receive new online magazine issues and posts from From Scratch
  3. Leave a comment telling us what your hen’s favorite treats are!

A winner will be chosen on May 7th.  

Congratulations to Savannah! You are the winner of the giveaway!

Good luck!

Read More